[youtube]http://www.youtube.com/watch?v=zhQGj0SWZWY[/youtube]In the Javascripts Free Scripting Tutorial I will completely cover all of the capabilities Javascript offers. Javascript is a scripting language that allows you to make your website more interactive. While HTML provides the structure and CSS provides the styling, Javascript allows you to add functionality to your website that users visitors expect.
In this first article, I’m going to give you a brief overview on how Javascript works. In those articles that follow I will teach by walking you step-by-step through real working Javascript Scripts.I’m going to assume you have read or watched the above HTML and CSS tutorials. Anytime I refer to Javascript Code, I’m talking about a series of commands I am making to the browser. Continue reading Javascripts Scripting Tutorial Part 1→
Note: Click the High Definition Button and Full Screen Button, to see these videos at the highest quality level.
I hope everyone enjoyed the series of articles I wrote recently on CSS. You definitely could add CSS Expert to your resume if you read the whole thing. But, where are the videos? I’ve assembled 6 videos below that go through every subject covered in the articles. I hope you enjoy them. (Hint: Comment Below)
In this article I’m going to completely cover layout and positioning with Cascading Style Sheets and xHTML. If you haven’t read/viewed my xHTML W3C Tutorial or my Adding CSS Style to HTML article, you should do that first.
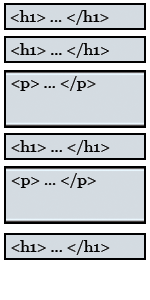
It is very important to enclose all of your code into a series of block elements. Everything on your page should be enclosed by a Header or Paragraph Tag. If you do that, not only will you be xHTML compliant you’ll also have no problem with positioning your content.
If you forgot, here is a list of every block element tag:
<blockquote> : Block Quote
<div> : A block container that we’ll talk about soon
<dl> : Definition list
<form> : Form
<h1>, <h2>, … <h6> : Header Tags
<hr> : Horizontal Rule
<ol> : Ordered List
<p> : Paragraph
<table> : Table
<ul> : Unordered List Continue reading Adding CSS Style to HTML: Layout & Positioning→
CSS treats everything as if it was a box. Every box has the following properties:
Content Area: Which holds all of your content including text, images, etc.
Padding Area: Blank area that lies between the Content Area and the Border
Border: Optional line, that lies between the Padding and Margin
Margin: Optional area, that surrounds all of the other parts of the box.
If you have watched my HTML Tutorials your probably asking yourself, “When is he going to talk about CSS?” Well, today is the day. Cascading Style Sheets (CSS) are used to completely control the look and feel of your website.
When HTML was merged with xml to become xHTML, CSS took off because now we were able to create our own tags and the possibilities became endless. You define how you want to add style to your pages in one of two ways. You embed the CSS styling rules directly into the xHTML file or you link to an outside CSS file. It’s better to link to an outside file so through out this course that is what we’ll do. Continue reading Adding CSS Style to HTML→
[youtube]http://www.youtube.com/watch?v=tB5ozZJbD34[/youtube]I was surprised to get this question emailed to me after my HTML W3C Tutorial. This article will be a bit more technical, but I’ll try to keep it light on jargon. By the end of the article, you’ll be able to tell people you know how to write Extensible Hypertext Markup Language version 1.0 Strict that is W3C complaint!
First W3C stands for the World Wide Web Consortium (W3C). They are the group of people that tell everyone how to write HTML and Cascading Style Sheets properly, among other things. What is well written HTML (W3C)? It is HTML that can be viewed on most any device with a browser.
The most current version of HTML W3C is referred to as XHTML 1.0 Strict. XHTML is now known as eXtensible Hypertext Markup Language because it has borrowed format from another language called XML. XML is a language that is used to markup, or structure any type of document, with tags just like HTML. The major difference between XML and HTML is that with XML you can create your own tags, instead of being stuck with the limited quantity found in traditional HTML.
I’ve had some requests to show you the php script I used to process and send the email from the HTML W3C Tutorial. So here you are. I’ll go through everything, like before, by including the code in black and white and my descriptions of the code in a blue box.
[youtube]http://www.youtube.com/watch?v=Ncy6LDjSiX4[/youtube]Today, I’m going to completely explain the Hyper-Text Markup Language (HTML). You’ll probably be surprised by how uncomplicated it is. I hope?
A web browser reads HTML, which is just a text file filled with tags. Tags are just words or individual characters in angled brackets, that tell the browser what test needs emphasis, is a paragraph, where to get images, how to take a visitor to another page, etc. There are 89 total tags, but most of the time you will use only 20 total tags. Here are the most common tags:
<!DOCTYPE> : Defines what type of document your using. This will almost always be the same on every HTML page you ever create.
<a> : Defines a link, that if clicked will take the user to another web page
<b> : Tells the browser, you want the text inclosed to be bold.
<body> : Your main content will reside between to body tags
<br /> : Creates a line break.
<em> : Italicizes the text between these tags.
<form> : Defines an area in which the visitor can interact with your website.
<h1> to <h6> : Defines text that you want to emphasize, such as a title.
<head> : You describe the content of the document, between to head tags.
<hr /> : Draws a horizontal line on your web page, to separate content.
<html> : Defines the beginning and ending of your html page.
<img /> : Tells the browser, you want to insert an image.
<li> : Defines an item in a list, you wish to bullet, or number
<ol> : Tells the browser, an ordered list is about to be defined
<p> : Defines that a paragraph of text is being defined.
<table> : Tells the browser, you’d like to present your information in table format.
<title> : Defines the title of your document
<ul> : Tells the browser, an unordered list is about to be defined
[youtube]http://www.youtube.com/watch?v=hWJx_N0VUf0[/youtube]Here I’ll show you some free tools that will tell you if you have a good website. These tools also show you exactly what may be wrong and how to fix them.
Website Grader is a free seo tool that measures the marketing effectiveness of a website. It provides a score that incorporates things like website traffic, SEO, social popularity and other technical factors. It also provides some basic advice on how the website can be improved from a marketing perspective. I’ll list here everything you’ll find out with Website Grader: Continue reading Free SEO & Page Rank Software→
[youtube]http://www.youtube.com/watch?v=d2-npuBBfHM[/youtube]This article answers a question from a recent email. “…It’s great that I can post to multiple social networks automatically … wouldn’t be great if I could do the same with video?” Well if you missed the previous article, I explained how to automatically post your post’s to multiple social networking sites.
There is a website that posts your video’s to multiple sites as well. It’s called Tube Mogul! Tube Mogul aggregates video-viewing data from multiple sources to give publishers an improved understanding of when, where and how often their videos are watched, track and compare what’s hot and what’s not, measure the impact of marketing campaigns, gather competitive intelligence, and share the data with colleagues or friends.
[youtube]http://www.youtube.com/watch?v=A4zYG-ORdLQ[/youtube]Today I’ll describe an amazing plugin for WordPress called WPing FM. This plugin will automatically submit every post you make on your website to over 30 different social networking sites. Why would you want to do that? Google ranks sites well if they have a large number of in-coming links, that’s why! So by using this tool, everytime you write anything, it will automatically create 30 plus in-coming links for you. I describe exactly how to set it up in the video above.
Also, a person recently left a comment that he, “wanted a plugin that would display links to his social networking pages.” I also describe a plugin that does just that in the video above. It is called Social Profilr. (No that isn’t a typo, it is spelled Social Profilr) If you also want a video custom made for you, just post your question below. I read all of them.
[youtube]http://www.youtube.com/watch?v=FBSG2H_R0jI[/youtube] There is finally a way for anyone to create their own website design. Is the tool free? Nope, sorry for the first time one of my tools isn’t free. Is it expensive? Nope, at least not for what it does.
It’s called Artisteer and it costs $49.95, but it will allow you to create a wide variety of your own designs. Your actually on an Artisteer created site right now and here are a few more:
[youtube]http://www.youtube.com/watch?v=wOiV9SrS6xU[/youtube]I was talking to someone yesterday about how quickly you can set up a website and fill it with content. I told him it takes me about an hour to:
[youtube]http://www.youtube.com/watch?v=UpDYxHyBZfA[/youtube]There are many expensive tools you can use to create customized polls and questionnaires on your website. Today, I’ll show you how to create a custom, automated poll by embedding a Free Google Spreadsheet.
[youtube]http://www.youtube.com/watch?v=vcUZmtH7CSQ[/youtube]On this page, I’ll cover all of my favorite WordPress Blog Plugins. Each blog plugin has been tested on the newest version of WordPress version 2.9. Plugins can extend WordPress to do almost anything, but it is possible to have too much of a good thing. Remember for every plugin you add to your site, you are incrementally slowing down your website load time. So choose wisely.
Google (XML) Sitemaps Generator for WordPress: This is the first of the blog plugins to install on your site. It will create a sitemap.xml and robots.txt file for you and then update those files each time you change your site and inform all of the major search engines of the changes. A sitemap.xml file tells search engines:
What is on your site
What are the most important pages on your site
How often the search engine should check your site for changes
Amazingly enough, many web developers do not create this extremely important file for their clients. A robots.txt file, tells search engines where they can locate your sitemap file. The video above shows you how to install and set up this plugin as well as the Google Analytics blog plugin.
[youtube]http://www.youtube.com/watch?v=vcUZmtH7CSQ[/youtube]In this article, I’ll show you two Blog Plugins that will submit your website to search engines for free. Each plugin has been tested on the newest version of WordPress version 2.9. Plugins can extend WordPress to do almost anything, but it is possible to have to much of a good thing. Remember for every plugin you add to your site, you are incrementally slowing down your website load time. So choose wisely.
[youtube]http://www.youtube.com/watch?v=_TfkZ7lXx4E[/youtube] I’ve been setting up websites for some time now and I keep seeing people throw money away time and time again. One way that people spend more than they should for their website is based off of confusion on what to buy when setting up their website. You should almost never spend more than $7 per month on your website. In this video, I walk you step-by-step through the process of buying a hosting plan with GoDaddy.
I use GoDaddy because they have good support, my website has never been unavailable, and they are cheap. There are many other great hosting companies and this is in no way an advertisement. If you use GoDaddy though you have to watch out because they go out of their way to up sell you products that you don’t need. Continue reading Setup your Site Inexpensively→
Based off of the best statistics, I’ve found, there are over 187 million blogs. People obviously love reading and writing blogs. There is little doubt then, that a business that doesn’t speak to its customers through blogging, is definitely alienating its customers.
In this day in age, it is very easy for any business owner, no matter how small, to create a website. These websites must build customer relationships, while pulling in business from all over the world. In the past, business owners needed to rely on extremely expensive web design companies to build them a site. Those days are now in the past, thanks to a fabulous program called WordPress.
WordPress, is a free blogging tool kit, that brings the power of internet blogging to the people. WordPress is the largest self-hosted blogging tool in the world, used on millions of sites and seen by tens of millions of people every day. The goal of this series of articles is to help people get started with WordPress. It really is quite easy.
There are two versions of WordPress. There is the blogging software you can use with WordPress, at wordpress.com. This operates in a way similar to most social networking systems like Myspace, Facebook, etc. There is another version, that you host on a hosting company, such as GoDaddy. This version can be downloaded from wordpress.org. If this is a bit confusing don’t worry. The video tutorials will show you exactly how to set up both of these versions of WordPress.
WordPress is so easy to use, because it takes care of all the technical stuff. This allows you, to spend all of your time writing. Whats better, is that WordPress allows you to easily create amazing tools and new web designs, with ease. We’ll get to them later.
A Few more Reasons why WordPress is Amazing
It installs easily! Normally, it will take you no more than 5 minutes.
It helps you organize all of your articles in a logical manor.
Search engines absolutely love WordPress websites.
If you follow this tutorial, your Google Page Ranking will probably be higher, than if you hired a web design firm.
WordPress is not just used for blog websites. You can use it to create a traditional site as well.
There are many pre-made web designs for you to pick from. If you want a new design for your entire site, you can have it in a few seconds, with no design or technical knowledge.
Your customers want to interact with your website. WordPress provides you with easy to use enhancements that allow you to add bulletin boards, calendars, RSS feeds, video, audio, shopping carts, etc.
It will block unwanted spam from your site.
The Difference between WordPress.com & WordPress.org Websites
As I mentioned before, a WordPress.com site is similar to a social networking site. It is hosted on WordPress computers. It is free, for the most part, and extremely easy to set up. Almost every technical activity is taken care of for you such as: saving your content, blocking spam, security, upgrading, and promotion.
Let’s go back to that free sort of comment. First, in my opinion, WordPress deserves every dollar they make. I just want to make that clear. Either way, if you want to gain special benefits at WordPress.com you must pay for the following (prices on December 2nd, 2009):
The Custom CSS Upgrade allows you to use your own CSS (Cascading Style Sheet) to customize the appearance of your blog. CSS allows you to change fonts, colors, borders, backgrounds, and even the layout of the blog. The cost is $14.97 per year.
If you want to use a custom domain name that doesn’t end with wordpress.com you can either pay WordPress $14.97 to both register and host your domain for a year. Or if you already own a domain name, they charge $9.97 for you to host that domain name on their servers.
WordPress gives you 3 gigabytes of space to use for free on their computer. If you want more, you get 5 GB for $19.97 / year, 15 GB for $49.97 / year, or 25 GB for $89.97.
If you don’t want WordPress to put ads on your site, you have to pay them $29.97 / year.
There is a limit to the number of private users you can have on your site. If you wish to buy the unlimited users, instead of staying at the standard 35, that will cost you $29.97 / year.
Now if you want to host your own site and control everything, the version of WordPress found on wordpress.org, is the way to go. You will gain access to a larger number of web site designs, called themes. You will only be limited in size by your chosen hosting company. You will also gain access to a larger number of tools, called plug-ins. Plug-ins, give you access to tools such as: e-commerce systems, a wide assortment of media tools, and basically anything else you can imagine.
The negatives of hosting your own site include: you must pay a hosting site to host your site (avg. cost: $7 to $15 / month), it is more complicated to set up (many hosting companies will set upWordpress for you), you are responsible for upgrading your software, and your sites up time will only be as good as the hosting company. I personally, use GoDaddy for hosting, but there are a large number of other great hosting companies.
The minimum requirements a hosting company must meet include having, PHP version 4.3 or greater and MySQL version 4.0 or greater installed. It’s also probably in your best interest to install on a Linux rather than a Windows server. The best hosting companies include: Blue Host,DreamHost, MediaTemple, and GoDaddy.
In the next article, I will go into detail on how to create a WordPress.com account. You should do this even if you plan to host on your own site to gain access to Akismet, a great anti-spam tool. An additional benefit to starting with a WordPress.com account is that it gives you the opportunity to see if WordPress is right for you. Whether you chose to host on WordPress or from your own hosting company, the interface of WordPress is nearly identical. So, if you learn how to operate a blog on WordPress.com, you’ll know how to run WordPress on a separate hosting plan as well.
I hope this clears up any questions about using WordPress. Next, I’ll dispel any beliefs that WordPress is complicated to set up. If I missed anything, please tell me how I might improve the post.
So, you want to start a website? There really, is no better place to bring that dream to fruition than at wordpress.com. In this article, I’ll take you through the entire process of setting up a website, that will be hosted with WordPress. To help you understand the process I have placed links to step-by-step video’s to help you along. Enjoy!
The process for signing up for an account, is the following:
Go to wordpress.com, with your chosen browser.
Click on Signup up now, which should be in the upper right hand corner of the page.
Enter a Username, you will remember.
Enter a Password, that isn’t easy to guess and that you’ll remember.
Reenter that password again.
Enter an email address, that you’ll have on hand, to verify your account.
Click in the box, next to: I have read and agree to the fascinating terms of service.
Click on the circle, next to: Gimme a blog! (Like username.wordpress.com)
Click on the Next button.
In the Blog Domain text box, enter the name for your site. It should be short, have something to do with the content of your site, and something you’ll remember.
In the Blog Title text box, enter the name you’d like to use for your blog. It should be descriptive of the content you will have on your site.
Choose your language preference.
Let the privacy check box selected, unless you don’t want search engines and just about everyone else to be able to find your site. What fun would that be?
Click the Sign Up button, and you are done with the setup process.
Check the e-mail account, you gave to WordPress. This will contain a link you need to click to finalize the whole setup process.
Now, in a browser go back to wordpress.com. At the top of the page enter your Username and Password and click on Log In.
This is how you would manually install a WordPress blog system on Go Daddy. The process of installing manually on most all other hosting companies, like Go Daddy, is nearly identical.
Here are the directions from Go Daddy’s website.
Installing WordPress using Hosting Connection is the easiest way to get WordPress up and running on your domain. However, you can install it manually into your shared hosting account if you so desire.
To accomplish this, you will need the following items:
* A compatible hosting account which supports PHP and MySQL.
* Your FTP account login information. This includes the FTP User Name and Password for your hosting account.
* A MySQL Database for WordPress and the Database information.
* The latest version of WordPress.
NOTE:This article assumes you already have a compatible hosting account and your FTP login information. If this is not the case, obtain these items and then return to the article.
Create a MySQL Database for WordPress
1. Log in to your Account Manager.
2. In the My Products section, select Hosting.
3. Next to the hosting account you want to modify, click Manage Account.
4. In the Databases section of the Hosting Control Center, click the MySQL icon.
5. Click Create New Database.
6. Enter a description, WordPress for instance.
7. Enter a user name and password.
8. Specify your MySQL version.
9. Specify whether you want to allow Direct Database Access.
NOTE: Direct Database Access is a less secure way to manage your hosted databases which most users do not require. If you do not need to access your database remotely, then you should not enable Direct Database Access. For more information, see Why Connect Remotely to Shared Hosting Databases.
10. Verify your MySQL database settings. If everything looks OK, click OK.
It may take a few minutes to create your database. Click your browser’s Refresh button to check if your database is ready.
Once you have set up a database for your account, you can find your host name information by clicking the Pencil icon next to the name of your database. Note the following items, as they will be needed later in the install process:
* Host Name
* Database Name
* Database User Name
Now, you need to download the latest version of WordPress from their servers. This can be found at WordPress.org.
Modify wp-config.php
Extract the WordPress ZIP file you downloaded and open the WordPress folder. Locate wp-config-sample.php and open it with a text editor like Notepad. Save a copy of the file as wp-config.php. You will be working in this file from now on.
In wp-config.php, locate the section that looks like this example:
/** The name of the database for WordPress */
define(‘DB_NAME’, ‘putyourdbnamehere’);
/** MySQL database username */
define(‘DB_USER’, ‘usernamehere’);
/** MySQL database password */
define(‘DB_PASSWORD’, ‘yourpasswordhere’);
/** MySQL hostname */
define(‘DB_HOST’, ‘localhost’);
Enter the Database information from your newly created Database as follows:
* putyourdbnamehere is your MySQL Database Name
* usernamehere is your MySQL User Name
* yourpasswordhere is your MySQL password
* localhost is your MySQL Host Name
WordPress includes security keys which add encryption of information stored in user’s cookies. These must be set manually in the wp-config.php file. Locate the section of the file that looks like this:
define(‘AUTH_KEY’, ‘put your unique phrase here’);
define(‘SECURE_AUTH_KEY’, ‘put your unique phrase here’);
define(‘LOGGED_IN_KEY’, ‘put your unique phrase here’);
define(‘NONCE_KEY’, ‘put your unique phrase here’);
Go to WordPress’ online key generator and insert the keys in place of the placeholder text in the wp-config.php file. When you are finished, save and close the wp-config.php file.
Install WordPress
Using an FTP client such as FileZilla, Fetch or gFTP, FTP into your server and copy the WordPress folder to your hosting account. This directory can be stored anywhere in your account, in this example it will be in the root (http://www.coolexample.com).
1. Begin the WordPress installation by going to http://www.coolexample.com/wp-admin/install.php, where coolexample is the name of your domain. This will launch the WordPress installation process where you’ll be asked for your Blog Title and Email address.
2. Enter this information and click Install WordPress.
3. The next screen will provide you with a username and password to log into your blog for the first time. Note that information, then click Log in.
4. Enter the username and password you just noted and click Log In. The WordPress Dashboard will display. This is the main administration center for your blog.
Your WordPress blog is now installed. For assistance in the set up and maintenance of your blog, see the Getting Started with WordPress page at WordPress.org.